Here is one way to go about creating an alpha channel. It also teaches you a little about working with the selection tools.
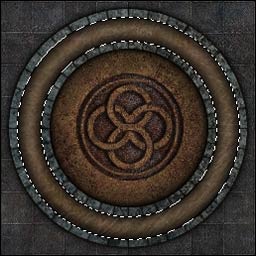
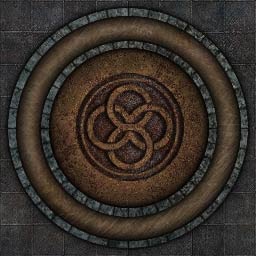
Step 1 - We're starting with MrClean's texture to work along with Raven's decal tutorial. If you like, you can double-click the hand tool to blow up the image. Its a lot easier for me to work with this way. To go back to normal size, double-click the magnifying glass.:
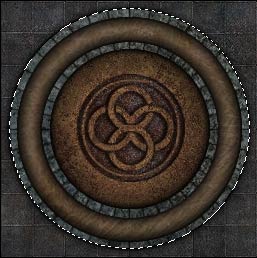
Step 2 - With the elliptical marquee tool, select the design in the middle. Holding down shift while dragging will make your ellipse a perfect circle. You can also hold down the spacebar while dragging your selection around the screen to make sure it lines up properly.:
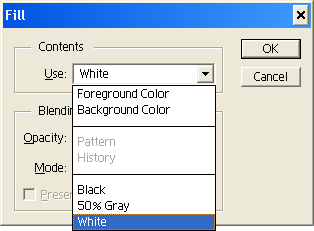
Step 3 - Click on the channels tab, then hit the create a new channel button . This will create a new channel called "Alpha 1". At the top menu bar, go to edit -> fill. From the drop down menu select white and click ok.:
Step 4 - Click the layers tab to go back to your texture. Hit ctrl-d to make sure everything is deselected. With the elliptical marquee tool, select the inner edge of the outer ring on the design. After it is lined up where you want it, hold down alt and select the second stone ring. Holding down alt while using the selection tool subtracts from your current selection. Remember to use the same techniques from step 2 to get your selection lined up right.:
Step 5 - On Alpha 1, repeat the last two lines from step 3. Except this time select black from the drop down menu and click ok.:
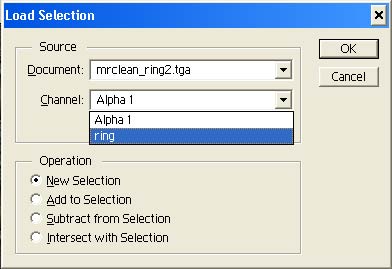
Step 6 - Using what you learned in the previous steps, select one ring from the knot design in the center. Then from the top bar click selection > save selection. Name it "ring" and click ok. This creates a new alpha channel with your selection saved in it - this way you don't have to reselect every ring. If you accidently deselect your ring, you can go to selection > load selection and from the drop down menu choose ring. :
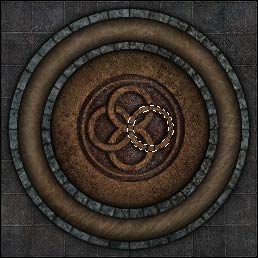
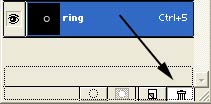
Step 7 - Repeat step 5, choosing white instead of black. Click back to your image and drag the selection to another ring. You will need to have the elliptical marquee tool selected in order to get the proper arrow. Add this selection to your alpha channel. Continue moving your selection around the knot, adding each ring to your alpha channel until complete. Go ahead and delete the "ring" channel by dragging it to the trashcan.:
 to blow up the image. Its a lot easier for me to work with this way. To go back to normal size, double-click the magnifying glass
  .:
.:
 , select the design in the middle. Holding down shift while dragging will make your ellipse a perfect circle. You can also hold down the spacebar while dragging your selection around the screen to make sure it lines up properly.:
 , then hit the create a new channel button
  . This will create a new channel called "Alpha 1". At the top menu bar, go to edit -> fill. From the drop down menu select white and click ok.:

 to go back to your texture. Hit ctrl-d to make sure everything is deselected. With the elliptical marquee tool, select the inner edge of the outer ring on the design. After it is lined up where you want it, hold down alt and select the second stone ring. Holding down alt while using the selection tool subtracts from your current selection. Remember to use the same techniques from step 2 to get your selection lined up right.: